So I had these grand plans to do a little “painting a Genestealer” stage-by-stage, taking pictures as I went. Unfortunately the pictures haven’t turned out great, I really need to practice this picture taking malarkey to be honest. As it’s my first attempt at one of these, I thought I’d throw it up here for people to criticise, comment and advise, rather than hide it and try and perfect it for some unknown time in the future.
So here’s how it went:
Intro
I’m a huge fan of the movie “Pitch Black” (the movie that gave Vin Diesel’s Riddick his first outing), and I’ve always been tempted to paint some Tyranids in something like the colour scheme of the monsters in the movie. I’ve had these old Genestealer models hanging around for an age, and the new Tyranid Codex has got me toying with the idea of starting an army of ugly bug creatures. As all armies start with a single soldier (this is in NO way a famous, or even a particularly good phrase…), I started with this one.
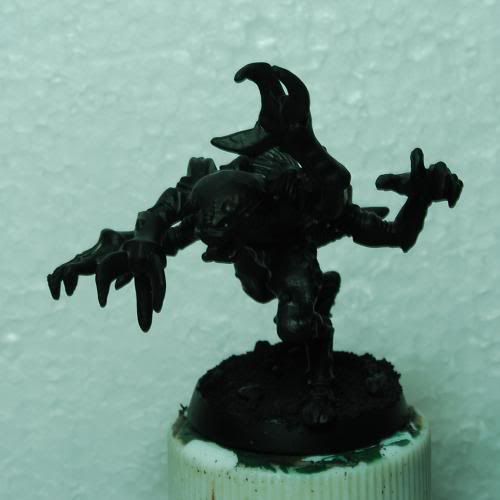
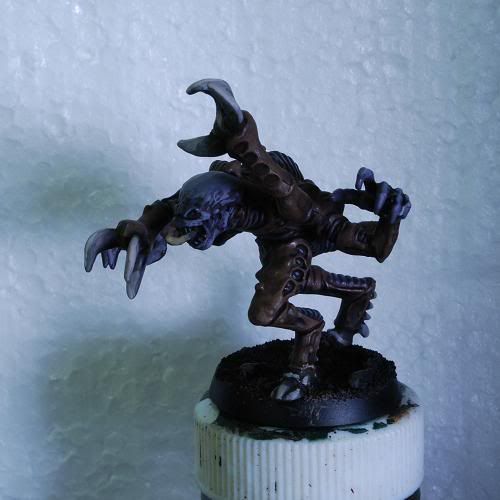
1. Undercoated Black. Nothing novel there – I tend to undercoat in black as it gives me a good start for shading. My miniatures tend to be a bit more “grimdark” (love that term), than in White Dwarf, as I don’t like bright colours. I also base miniatures before undercoating – I notice my local GW store doesn’t do this – I think it’s crazy, as it saves a lot of time in the long run.
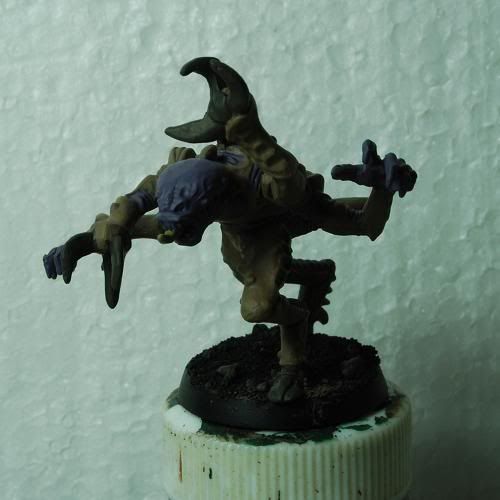
2. Basecoats. Main body is Khemri Brown, Claws and feet are Charadon Granite, and the head and fleshy bits are Leviathan Purple.
Nothing particularly ground breaking here, just a good solid foundation. I wasn’t too fussy here, as the next stage would cover up any mistakes…
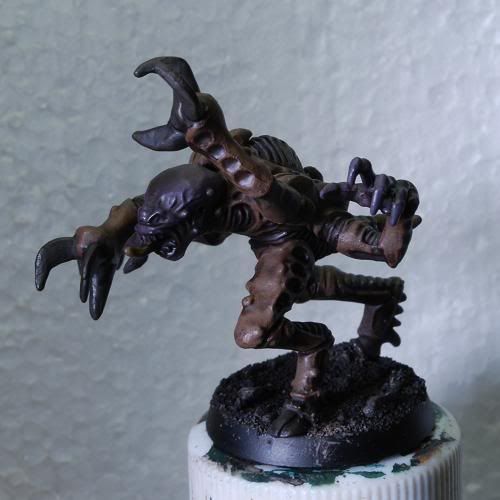
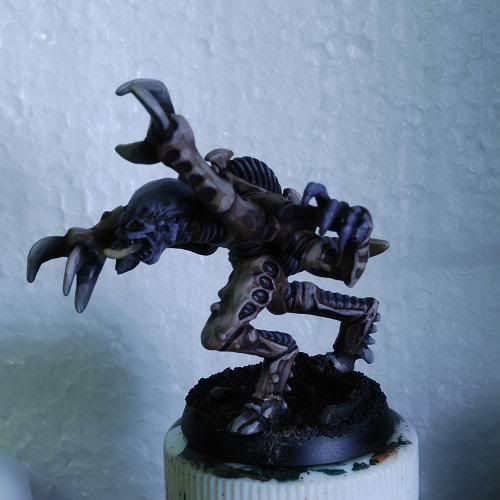
3. All over wash with Devlan Mud – this ties everything up together and provides the basis of some graduated shadows.
4. Highlighting the purple. I did the highlighting in two stages:
- 50:50 mix of Codex Grey and Leviathan Purple
- 33:33:33 mix of Codex Grey, Leviathan Purple and Astronomican Grey
Not too bright and not too purple – the effect I was going for!
NOTE: By this point I was reasonably happy with the way this was going – it was all going together the way I wanted and the pictures weren’t too bad.
- Charadon Granite
- 50:50 mix of Charadon Granite and Dheneb Stone
- Pure Dheneb Stone
- Khemri Brown
- 50:50 mix of Khemri Brown and Dheneb Stone
- 10:90 mix of Khemri Brown and Dheneb Stone
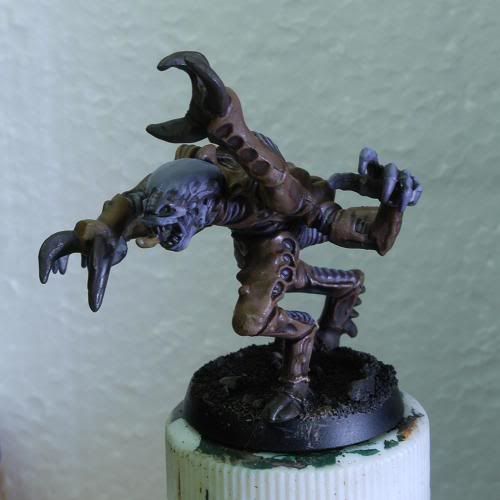
NOTE: This is where it starts to go downhill a bit (in my opinion, readers may think the decline started much earlier…). The picture’s not great and the highlights on the body look a little “slapdash”.
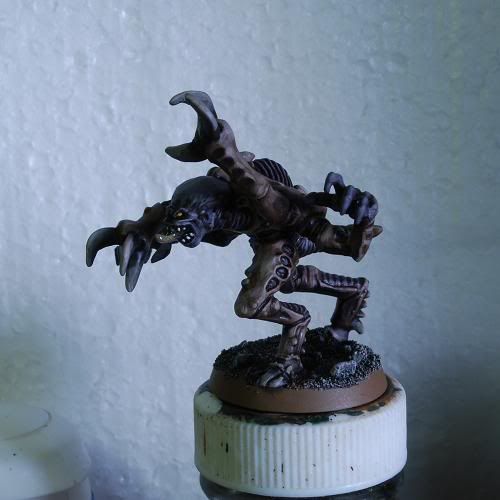
7. Finishing up. I’d already planned to throw some “Blanchitsu-style” at this ugly monster, so I gave it an all-over wash of very watered down Devlan Mud. Once this was dry, a very, very light drybrush of skull white was added to the top edges and surfaces – this helps pick out the top parts of the model and gives a little more definition – good for standard troops, not so great for character models where a more controlled highlight works better. Final painted bits
- The tongue was highlighted with Gretchin Green and Dheneb Stone
- The teeth were painted Bleached Bone and the the tips painted with Skull White
- The eyes were painted Snakebite Leather, shaded with a line of Chaos Black and highlighted with Iyanden Darksun
- Base done in the usual Brevik way, drybrush with a brown (Khemri Brown here) and then Skull White. Edge of the base is Graveyard Earth
Finally the model was sprayed with Humbrol Matt Acrylic Varnish – which is a far better product than that satin stuff that GW sell, this is a proper Matt finish. Some gloss ‘Ardcoat was painted into the mouth and on the tongue to give that slimy “Alien” look.
NOTE: It really falls down here, the picture is bad and in no way does the miniature justice. I’m going to sort that out.
End of “Article”
So what do people think? Was anything good about it? Was it useful? What can I do to improve it? As for all the things I’ve posted on this blog, all comments and criticism greatly received. Feel free to be brutal (as long as it’s polite ;-) ).
I’ve learned a hell of a lot from various sources on the internet, and I really want to start paying that back.
I think it is a great article. I realised a while ago that I'd got into a rut with painting and not improved. Now I take real notice of every article and idea I see to figure out if any of it will help me.
ReplyDeleteFrom this one, I got the tip of light skull white drybrushing to brighten up a few bits of the model, the use of the final thin glaze of a wash and the advice on varnish coating at the end.
Great article and keep it up. One point for the photos would be to host them in full size (say 1024x768) on photobucket or the like and then just put a reduced size one on the blog. Then you can click on the photo to get the full view while not taking up the whole page.
The way to do this is to upload the photo through the blogger. You'll end up with something that looks like this (though I've cut off the start here):
style="display:block; margin:0px auto 10px; text-align:center;cursor:pointer; cursor:hand;width: 1024px; height: 768px;" src="http://i755.photobucket.com/albums/xx198/PGWALLIN/IMG_7634.jpg" border="0" alt="" /
Then change the width and height of the image. I find that 384x256 is pretty good for showing it without taking up too much space
Thanks Pete! I'm actually feeling much better about it now. I thought I had done what you'd suggested for the pictures, but that was the first time I'd used Windows Live Writer and apparently it had other ideas...
ReplyDeleteAll the pictures are 500x500 in photobucket.
I'm fairly sure the other posts on this blog are done right, I'll have to check.
I'm glad I've helped you a bit too - that makes it all worthwhile. :)
Right, formatted the pictures sensibly.
ReplyDeleteNicely Done Andy. The pictures look better and it's nice to have that little zoome in to be able to see the details better.
ReplyDeleteThumbs up again and know that you'll always have at least one attentive reader ;-)
Pete
PS: I loved Pitch Black too.
Pull my geek card, but I've never seen Pitch Black. It's been on the radar but just never gotten around to it.
ReplyDeleteWish I'd seen this article a week ago. I was doing a similar chitin color on some Genestealers and had been blending up from a base Scorched Brown to Graveyard Earth... It was a little tedious. I wandered by my FLGS, saw Khemri Brown right above the Devlan Mud and had a "duh" moment.
Thanks Pete. :)
ReplyDeleteDverning - it's amazing how much easier foundations and washes have made things - you still have to put the work in when it comes to highlighting, but the foundation and wash provide a solid base and shade for you to start from.
As you can probably tell, I use foundations a LOT, as I like the flatter, earthier tones.
As for Pitch Black, it's well worth watching. I'm waiting for it to come on Sky HD... :)