Showing posts with label Warhammer. Show all posts

Monday, 20 February 2012

Vampire Complete

A little later than planned, here are the finished pictures of Lord Vacu, Dark Prince of somewhere eerie, drinker of the blood of virgins, etc, etc.  He's come out alright, but doesn't have quite the "presence" I was hoping for.  Maybe it's just the miniature itself, or it's the paint job, or more likely a combination of the two, I don't think it quite pulls off the elegant, decayed look I was going for.


A really simple paint scheme for the skin:

  • Base:  Dheneb Stone
  • Shade:  Thinned Devlan Mud wash
  • H1:  Dheneb Stone
  • H2:  1:1 mix of Dheneb + White
  • H3:  Pure White
It gives that pale stark look, and frames the sunken red eyes really well.  In the picture below you can see a slight slip-up - the hand furthest away is missing some flesh tone under the thumb side of the palm - not sure how I managed to miss that, but it will be fixed at some point


I wanted to give the black an aged, decayed look, so I used the Charadon Granite and Dheneb Stone highlighting method I've used before.  It's pretty simple:

  • Base:  Neatened up black
  • H1:  1:2 mix of black and Charadon Granite
  • H2:  Charadon Granite
  • H3:  1:2 mix of Dheneb Stone and Charadon Granite
  • H4:  2:1 mix of Dheneb Stone and Charadon Granite


The last thing to do was the base:

  • Base:  Charadon Granite
  • Shade:  Devlan Mud Wash
  • H1:  Charadon Granite
  • H2:  Khemri Brown
  • H3:  Dheneb Stone
  • Wash:  Gryphonne Sepia
Originally I tried sticking some "Autumnal tufts" that I bought back at the Colours show, but it just looked too bright and cheery, so off the tufts came and I fell back on the more appropriate GW Scorched Grass.

In the pipeline is something from Freebooter, this chap from Reaper, more article stuff, a bloody great Malus Darkblade model for some chap called Kenny, and some Malifaux...

As always comments and criticism are most welcome - especially if you could offer some advice on giving this chap more impact.

Sunday, 12 February 2012

Vampire - Adding a Little More Colour

Steady but slow progress on Mr Classic Vampire (he doesn't have a name yet).  Nurgle appears to have visited the Walker household, as both the wife and I are suffering from whatever winter bug is doing the rounds here in freezing cold Swindon.


I didn't want to do a bright red for this chap, so I went for more of a maroon colour:
  • Base: P3 Sanguine Base - this is a nice colour, but does seem to take a couple of coats to cover a black undercoat properly
  • Shade:  Leviathan Purple wash - in hindsight, I should have watered this down a little, and maybe added some Baal Red, as it's gone a bit dark.
  • H1: Sanguine Base
  • H2: 2:1 mix of Sanguine Base and GW Vomit Brown
  • H3: 1:1 mix of Sanguine Base and GW Vomit Brown
  • H4: 1:2 mix of Sanguine Base and GW Vomit Brown
I reckon the colour has come out pretty well, and makes for a nice change from my normal red scheme.


Next up is the face - I'm going for a really pale skin tone, and I'm toying with the idea of some small tattoos on his face - not sure yet though...

As always, comments and criticism welcome!

Wednesday, 8 February 2012

Vampire - Metallics Done

A little bit of progress tonight:


The gold was made to look a little more bronze than usual, I wanted it to look old, but not dirty/oxidized.  I'm hoping it will work well with the Maroon/Black colour scheme I want to use on him.

  • Base:  Tin Bitz
  • Shade:  Devlan Mud
  • H1:  Tin Bitz
  • H2:  1:1 mix of Tin Bitz and P3 Blighted Gold (I'm really liking this colour)
  • H3:  Blighted Gold
  • H4:  1:1 Mix of Blighted Gold and Mithril Silver
The other bits I got completed were the jewels - apologies for the picture, I used my phone camera to make the transfer to PC a little easier, but it does mean the quality suffers.


They were done in the classic GW style:
  • Base:  Reapplied Black
  • H1:  Dark Angel Green
  • H2:  Camo Green
  • H3:  A small "tick" of White added to the opposite side of the jewel.
Next up is the dark red/maroon of the shirt and sash.

As always, comments and criticism welcome!

Sunday, 5 February 2012

A little Vampiric WIP and some shopping

Nothing too much to report, but I'm going to try and get a few more of these little updates done each week.

First up, the Vampire - the bat idea just wasn't going to work, so I hacked up a little polystyrene to go around the pins:


I glued some larger stones (Woodland Scenics medium ballast I think) to the top of that and coated the whole lot in PVA glue to make it a little tougher.  Unfortunately I managed to miss a couple of small patches with the glue, and the propellant from the spray on undercoat ate away part of it (D'Oh!).  The little holes were filled with glue and stones, and actually look pretty good. 

The lack of progress this weekend was due to a break in London, which included the usual trips to Forbidden Planet and Orc's Nest (who have a good restock of Reaper miniatures), but I also took a side trip to Waterloo and visited Dark Sphere a lovely little store with a good range of products and really friendly, helpful staff.  I didn't spend too much, but did manage to pick up Kapitan Ivanka and Granny Weatherwax as well as a couple of bottles of Vallejo paint to experiment with.

I strongly recommend you pay them a visit when you're that way, from my 15 minutes in there I spotted:
  • GW
  • Privateer Press
  • Infinity
  • Malifaux
  • Flames of War
  • Spartan Games
  • Avatars of War
  • Kromlech
  • Micro Art Studio
  • Scibor
  • ForgeCraft
  • Gale Force 9
  • Vallejo
  • Army Painter
Coming from Swindon, where we have GW, and not much else, it was a little bit of gaming geek heaven.  :)

Tuesday, 24 January 2012

The New Lair, nearly done!

It's been a long hard slog, I've been incredibly destructive and happily constructive, I've learned to plaster and to mount a flatscreen TV to a wall.  I've learned how the Dulux PaintPod is so much better than a normal roller, and how some Victorian red bricks are harder than others (I have a masonry drill bit with a perfectly flat end to prove it...).

But it's been worth it, and I'm about 80-90% of the way there.  Please excuse the photography, as it's from my phone, but this is where I've got to:


This side of the room is pretty much done - I've got to build a paint rack to go on the blank bit of wall next to the sticky board and mount a few pictures.  I know I'm incredibly lucky to have a spare room to dedicate to my hobby, so hopefully this doesn't come across as me showing off - this is pretty much a dream come true for me, and I'm really pleased that I've managed to do most of it myself.  Having the camera permanently set up is already making my life easier when it comes to photography for articles.

This should be where I'll relax after a hard evening's painting:


A big thank you to Kenny from the Ancible for the Infinity posters - with some glass clip frames from B&Q they really do look the business.  I'm not sure if I'll be allowed to sit on the sofa-bed though, as these two characters will generally be hogging it:

Hex (The Devious)

Ponder (Lord of all He Surveys)

They're only allowed in the room when I'm in there (they're part of the reason I needed the room in the first place), as they see the desks and the shelves as a giant cat tower for them to play on, and all the little things on the desks as their toys, the little buggers...

Actual hobby-wise, I've already had to start on painting for the next article, I'm cracking on with the Fellowship of the Ring for the in-laws, and I've just started my little Vampire project.  He's a (very) old Marauder Miniature (remember when they did loads of cool stuff for GW?) which I've always loved.  The previous paint job was not too bad for when I did it around 15-20 years ago (gulp), but he needs a fresh new look.


I originally just mounted him to a base, but that looked a little dull, and I wanted him to stand out, so the plan is to have those two pins surrounded by bats, so it looks like he's being borne aloft by them.  I've got some old Marauder Miniatures bats that I'm going to try and carefully pin and position around the bottom of his robe.  Hopefully this will look pretty good, the bats are quite two-dimensional so it should work.  Hopefully, the next post will have some pictures of him plus bats.

As always comments and criticism welcome!

Sunday, 17 July 2011

Polluted Royalty

I've posted about this chap a while back, but hadn't progressed him for ages.  I'd got a bit stuck with him, but in my desire to get my workstation cleared ready for the next projects, I put some serious effort into getting him finished.  Only quick pictures today, I'm going to sit down next weekend and learn how to use this camera properly...


I've described the green method before, but here it is again:
  • Charadon Granite base coat
  • Devlan Mud wash
  • Charadon Granite overbrushed highlight
  • Charadon Granite + Catachan Green
  • Catachan Green
  • Catachan Green + Camo Green
  • Camo Green
  • Camo Green + Dheneb Stone as a thin edge/point highlight

As I've said I'd toyed with the idea of leaving it "clean", but this didn't feel right for a Nurgle Lord, so I painted in some discolouration patches
  • Base coat: Scorched Brown
  • Shade: Devlan Mud applied to the recesses
  • First highlight: Bestial Brown
  • Second highlight: Snakebite leather
This was also the scheme used for the Chaos Star quarters on the corners of the cloak.


I ditched the original brown colour of the cloak for a khaki/beige look .
  • Base coat: Khemri Brown
  • Shade: Liberally applied Devlan Mud
  • First highlight Khemri Brown
  • Second highlight: 1:1 mix of Khemri Brown and Dheneb Stone
  • Final highlight: Dheneb Stone
I think this works much better against the green.  I'm really pleased with the freehand - nothing complicated, but it's come out nicely, and not too big to be overwhelming.  I don't do a lot of freehand work, so it's something I'm going to be practicing more of from now on.


I wanted to make the metalwork look aged without it being too rusty looking - I know he's a follower of Nurgle, but a Lord still wouldn't be too impressed with having to use rusty axes I'm sure...
  • Base coat: Tin Bitz
  • Shade: Devlan Mud applied liberally
  • First highlight: Tin Bitz
  • Second highlight: P3 Blighted Gold (similar to the very old Citadel Colour Shining Gold, but a little darker)
  • Third highlight: Chainmail
  • Wash: 1:1 diluted Devlan Mud
  • Glaze: Heavily thinned Scorched Brown
  • Final highlight: Chainmail blended in to edges, top surfaces and points
  • Final shade: Devlan Mud applied to recesses
It's a bit laborious and it came about because the Blighted Gold wasn't really working for me, but I'm pleased with the end result.


The skulls, horns and axe handles were all painted the same way.
  • Base coat: Charadon Granite
  • First highlight: Khemri Brown
  • Second highlight: Dheneb Stone
  • Final highlight (skulls only): Skull White
I'm not sure about the base, but I think it's alright, I hadn't used lichen before and to be honest it's a bit of a pain, but I think it will get easier with practice.  I think varied colours would also help - particularly with a chaos figure brownish lichen, to suggest the plant life has died, would probably have been more appropriate.  Still it's not a bad effect, and something I'm going to be using more of in the future.

Question - does me listing all the colour I use help?  Do you guys read it all, or does it just get in the way?  Would I be better off posting pictures and shutting up?  I'm no expert but I like to share how I do things if it will help others.  I really would appreciate some feedback on this, so if I'm missing stuff too, let me know.

As always comments and criticism welcome, have at it!

Saturday, 14 May 2011

Nostalgia

A long time ago I got into the hobby via the wonders of Advanced Heroquest, and its little add-on, the Advanced Heroquest paint set.  Included in this box was a sprue from the Warhammer Fantasy Regiments box set (a wonderful box including 60 plastic miniatures released for WFB 3rd edition).  For those who never got to see this motherlode of plastic, this sprue had a dwarf, a wood elf, a dark elf, a skaven, an Orc and a goblin, with shields and alternative heads and weapons.  The dwarf was the first miniature I ever painted, and soon after bought myself the Regiments box.  In honour of my introduction to the hobby all those years ago, I decided to paint up a sprue of these guys.

The forces of Evil
I tried to paint these guys in an "old school" style of painting - kind of like they used to do in 'Eavy Metal back in the day.  So as well as blending and layering there's some use of drybrushing too, particularly on the metalwork:


The skin on the Orc I'm particularly pleased with - a little darker than I would usually do for an Orc.  The worst thing is that I don't remember properly how I did it.  I know it's Orkhide Shade as a base, but then I can only guess that it's a wash of Devlan Mud followed by Orkhide Shade up through Gretchin Green?  The metal has some Bestial Brown daubed in before the highlights were drybrushed on, to make it look a little rusty.  

The forces of Good (and a Dark Elf...)
These three are some of my all time favourite miniatures, particularly the Dwarf (I should have filled the divots in his hammer before painting, but never mind).  The Wood Elf's face is still a pain to paint even now, but at least he gave me some good practice painting "difficult" eyes...


Put up against the latest Dark Elf Executioner, the Crossbowmen is about 2/3 the size, it surprised me how much they had grown over the years.  This Dark Elf was painted before the assassin, hence the use of the "turquoise abomination" - I don't want to repaint that now...

The Shields
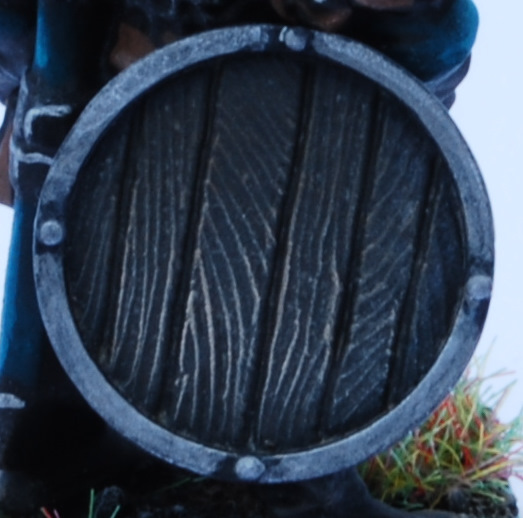
My favourite parts of these models, they really are fun little things to paint.  The Dark Elf shield is a bit dull (do Dark Elf Crossbowmen have shields these days?), but the rest have some nice character to them, particularly the Orc and Goblin shields:


The Orc one is my favourite, I'm not sure if the moon is meant to be orange, but it felt like a "Late 1980s/WFB 3rd" colour so that's what I went with.

As always comments and criticism welcome!


In other news, it looks like Blogger had a bit of a problem this week - apologies to SAJ as I can't remember what he asked on my Pedro post, before some of the comments got deleted.


Friday, 15 April 2011

Assassin's Creed...

Hmmmm, an oddly "Assassin" themed couple of weeks for me.  I managed to complete the first Assassin's Creed (if you're not a video gamer that might not have meant much to you) last week and have just started the second one, which ROCKS.

Added to that, alongside a couple of painting projects I've got on the go, I completed this chap (still a lamp short at the moment, so apologies for the pictures...):


Acting on Pete's good advice the turquoise was dropped  in favour of the leather looking colour (and gold for the knee spike) which definitely works (cheers mate!).  The cloak was built up from Chaos Black through Charadon Granite and finishing with Dheneb Stone, which although not traditionally dark enough for a dark elf assassin has worked out rather nicely..  The leather pieces started with Scorched Brown and blended in with Tausept Ochre as the top highlight.  It's a nice dynamic miniature that was actually fun to paint, and he would work well as a Blood Bowl player too!

My Dark Elf army now consists of 7 miniatures, good going for me...

In other news the owner of the Eldar Bonesinger was very pleased with the paint job I did for him, which was very rewarding.  I'm giving some thought to doing it as a little side line to make some extra cash, I just need to work out if I have the time...

The first Warjack is still ongoing, the good news is I have a red recipe I'm happy with, so hopefully he'll be done by next weekend

Thursday, 7 April 2011

A quick update...

Not too much going on this week, a couple of projects ongoing, but nothing that I can share yet.  My first Warjack is proving to be a bit of a pain, but I should make some progress on it this weekend.

While my motivation is at a low ebb, I had a crack at this chap:
I'm not happy with the turquoise, I think I'm going to get rid of that on all my dark elves and replace with something more appropriate - any suggestions?  I'm happy with the cloak and the face, I've gone for a paler skin tone on this chap, and I've just noticed I've forgotten to do the eyebrows...

Comments and criticism welcome!

Sunday, 27 March 2011

To rot or not?

In my previous post I talked about "messing up" the green on my Nurgle chaos champion.

I've decided against it.


I know it's going to be too clean, but I like the green as it is, which seems a bit of a cop-out, but one piece of advice I've always remembered is "when you're happy with it, don't do any more".

The green is slightly different to the shade I've used on the last couple of minis:
  • Charadon Granite base coat
  • Devlan Mud wash
  • Charadon Granite overbrushed highlight
  • Charadon Granite + Catachan Green
  • Catachan Green
  • Catachan Green + Camo Green
  • Camo Green
  • Camo Green + Dheneb Stone as a thin edge/point highlight

As always comments and criticism welcome!

In other news I've splashed out on a posh paint brush - one of these Windsor and Newton Series 7 everyone bangs on about.  I've not bothered with an expensive brush before, thinking that it won't make that much difference, but with both the wet palette and the light box making a world of difference, I thought I'd take the plunge.  I'll post some feedback once I've used it for a while.

Wednesday, 23 March 2011

Something Putrid this way comes...

A little work in progress shot of my next little project:


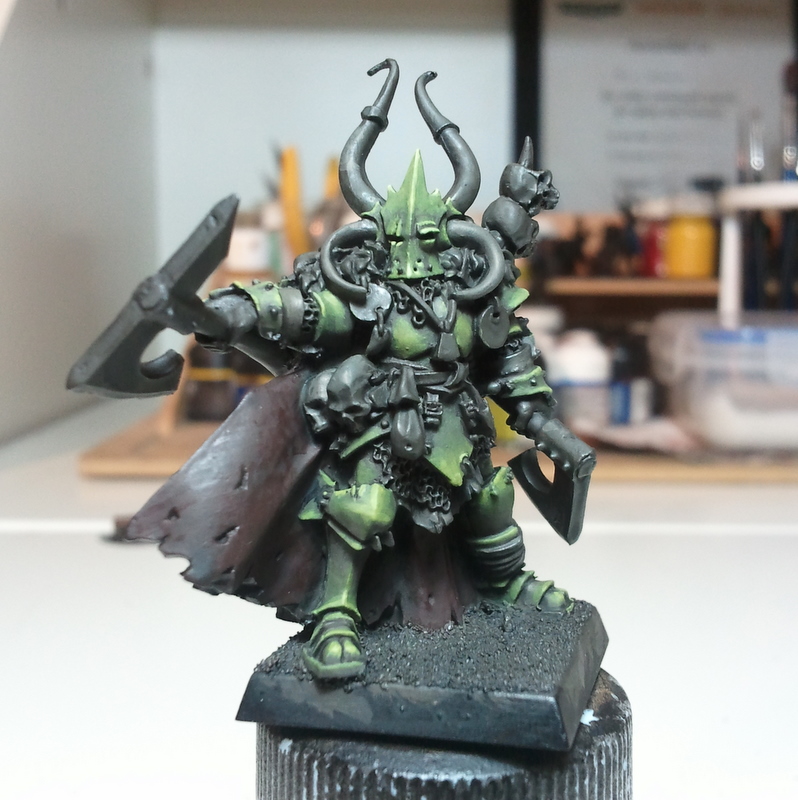
Sorry it's only the one image, it's the only good one I managed to take this evening.  The miniature itself is a beauty and befitting a limited edition Games Day miniature.  Nicely posed and well detailed, there's plenty to keep the painter interested, while everything is well defined and clear  It's easy to work out what bits are, and they're easy to get to.  The only tricky bit being the area behind the lower of the two axes, but that's just about accessible, and there's not too much detail to get to.  There were a few mold lines, and only a little "hedgehogification".  The axes are the only parts that come separate from the body, and they are a little tricky to get to stick, but nothing that patience can't solve.  It might have been worth pinning both parts, but I didn't as the small hole and spigot arrangement seemed to do the job OK.

As you can see the green is nearly finished, just some blending that needs neatening up and some extra highlights on the top edges that need to be added.  Once the "clean" green is completed, I'll then use various browns to get some dirt in, particularly where there is chainmail and gaps in the armour.  I'm thinking about making the damaged eye slit weep with something unpleasant.

After that I'll be moving on to the metallics, again base coated with non-metallic colours - time for plenty of corrosion and dirt to be added, and I doubt I'll go any brighter than GW's chainmail, and even then that will only be used on the top edges.

So far so good!

I doubt I'll get this chap finished by the end of the week, but I do hope to get the first Warjack built and undercoated.  The Dire Avenger is going to sit to the side for a bit as I don't have the enthusiasm for Eldar at the moment.

On a side note "What's new today" on the GW website has a fantastic Slaanesh Chaos Marine army - well worth a look!

Sunday, 13 March 2011

Lording it, in a Wood Elf fashion...

There have been a couple of WIP shots of this chap, but here he is finished.  I've always had a soft spot for Wood Elves ever since I first got into the hobby, and some of the latest character models are really nice.  This one was also a gift from a friend of mine - I guess I'm an easy person to buy gifts for these days?  :-)


The colour scheme for him was really simple, and he was quick and easy to paint - easier than the Dire Avenger, that's for sure.  The model leans forward a little too much, but other than that the pose is cool.  I like the little forest spirits they put on these models, they add a nice bit of character.  

As mentioned before I went for a more olive green for the cloak - Charadon Granite, shaded with Devlan Mud, then highlighted using Charadon Granite, Catachan Green and Dheneb Stone.  The forest spirit was a Scorched Brown undercoat, shaded with Devlan Mud, then highlighted with Scorched Brown and Macharius Solar Orange.  Everything else is pretty much painted the way I usually do, the recipes can be found in earlier posts.

I'm on to Warcaster Sorscha now, plus another Dire Avenger and maybe a WFB Chaos Champion...

As always, comments and criticism welcome!

Saturday, 5 March 2011

Weekend Progress

Evenin' all.

Had a quiet day painting and watching football today, the latter being a bit of a distraction to the former, but was relaxing all the same.

Progress was made on both the Dire Avenger and the Wood Elf Lord (the picture of the Wood Elf hasn't come out at all well):


I went for red on the spear blade in the end (sorry Big Al!), it just seemed to fit better with the rest of the miniature and matched the soulstones.  The Wood Elf just needs his eye painted in, and the tree and forest spirit need to be done, and he should be pretty much finished.  I'll take some pictures of him with a proper camera, rather than the one on the phone to show him in all his glory, as I'm really chuffed with the way he's come out and the picture doesn't do him justice at all.

As always, comments and criticism welcome!

Wednesday, 20 October 2010

Busy, busy, busy...but not painting

Argh, not much painting done recently, doing some long days at work and not really feeling like painting when I get home.  Add this to getting a little burnt out on the Eldar, and I don't have much to report unfortunately.  To get my mojo back I'm painting a few different (and pretty old) things, which I'll hopefully have some pictures of soon.

Anyway, just so this isn't a boring picture-less post, here's an old project that I've made some progress on recently:
I'm pretty happy with the way these guys look, the greeny-blue is possibly a little light for Dark Elves, but it doesn't look too bad.  These are my favourite of all the Dark Elf models, I just love the look of them.

Gluing those damn swords on are a royal pain in the backside though...

Tuesday, 22 June 2010

A quick update, another Berzerker, plus an Empire Soldier


Not much of an update, work, plus World Cup (and the pain of being English), plus a trip to London has eaten into my hobby time these last couple of weeks - off to Hard Rock Calling festival this weekend, but after that I should be back into the swing of things. 

First up is a Khornate Berzerker icon bearer I'd been working on - same colour scheme as the test model from a while back.  


Another reclaimed and stripped job (I think he cost me £2) - I can't stand the icon that came with that miniature, so I replaced it with the Khorne icon from the Chaos Space Marine box.  I think it works pretty well.

Next up is a test Empire militiaman/mercenary, part of my Witch Hunter themed Empire force.  A real quick and dirty paint job, I wanted to hark back to 3rd edition Empire, with a stripey pattern on the trousers.


He won't win any competitions, but if I can get a few more of these guys painted up, he'll look pretty good on the table top.

As always, comments and criticism welcome!

Wednesday, 2 June 2010

Getting ratty... (Part 1)

I'm going through an "irritable" stage at the moment, it doesn't take too much to annoy me, and there have been more than a  few days these last couple of weeks when I wish I'd never got out of bed.

Painting has been slow this last week or so, I've managed to complete two miniatures.

Just the two.  I've got into a painting rut again, the enthusiasm has died and I'm not sure how to regain it.  Nothing much appeals to me at the moment, and it's a bit worrying.  I'm tempted to just put everything to one side and start a new project, just to get the energies flowing again.

The next source of irritation is my lack of a decent photography set up - I need somewhere permanent, lord only knows where that will be though.

Anyway, just the one photo (i.e. the only one that came out OK in my last session):

Queek Headtaker


Pretty pleased with the paint job, hopefully some better photos should show him off better.  I went for metallic armour rather than red, as I didn't like the bright red armour on the GW paint job - this feels a bit more Chaos ratmen to me, although not quite so distinctive.  The warpstone pendant worked well too, might need a bit of work, but the OSL's not too bad.

The other miniature completed this week was a quick and dirty Warg rider for War of the Ring, 3 more of those to go...

What would people like to see me do next? I'm really open to ideas - my next post will be about an autumnal themed Eldar army that I have an idea for, but after that, who knows?

Saturday, 22 May 2010

Damned...

Not too much of an update - first Warg rider of four is done bar the basing - quick and easy paint job for him - they're not going to be display quality, just good enough to look effective on the tabletop.  Yarrick's on hold for a bit until I can get the enthusiasm to start on him again.  Kuffeh's Warrior Priest got me thinking about me doing some more to my pathetically incomplete Witch Hunter themed Empire army, and I painted up quite a decent test scheme on a Free Company soldier - I'll get some pictures of him up soon hopefully.

As for completed work, the only thing I have to show is this chap:


I've ditched the "brown" colour scheme as it just didn't look right, the black is much more effective I feel.  This was a reasonably quick paint job, again going for the tabletop, rather than display.

The black had only a couple of highlights, and the metalwork was washed a few times with Devlan Mud and Badab Black to get the"older" tarnished feel to it.  The flames weren't mixed at all, just layers of pure paint from red through to yellow.  The bone areas were Charadon Granite, Khemri Brown, Dheneb Stone, Skull White, with no mixing of paints.
The bad news is that I'm suffering a bit enthusiasm wise, it's proving quite tricky to motivate myself to paint.  I'm planning on taking some Crimson Fists to the GW store on Sunday and trying to get a game, hopefully that might help rekindle some enthusiasm...

Comments and criticism always welcome!

Sunday, 4 April 2010

The next Witch Hunter finished.

Well due to it being Easter in Britain, it's naturally been raining for the last week, so I hadn't had the chance to undercoat the rest of the Terminators (that was done yesterday).  So I knocked up another Witch Hunter (apologies for the dark pictures, not sure what's going on there).


This chap was missing his right arm, so I pinned on an arm from the Empire Militia sprue - fortunately the axe arm had a bracer on it to match the one on his left arm, so that worked quite well.  The only slight problem is that his right arm is now slightly longer than the left, but hopefully it's not too noticeable?

 
The paint scheme is the same as for the rest of them, nice and simple, and also quick.  I'm pleased with the face, which has come out quite well, although the eyes were a pain (again).

As always, comments and criticism welcome!