Showing posts with label Reaper. Show all posts

Monday, 10 February 2014

Back painting and posting!

Well it's been a while hasn't it?  I ran out of enthusiasm for writing blogposts late last year, my enthusiasm for the hobby was still there, but my painting was infrequent, and gaming was pretty much restricted to board games (Zombiecide, Descent) and Star Wars: X-Wing.  Work was stressful and painting, my usual stress relief, just didn't appeal very much.

Thankfully, a combination of The Desolation of Smaug and a fantastic 2 weeks off at Christmas brought my mojo back.  I've been painting regularly for the last month or so (as you'll have seen if you follow me on Twitter), and with the enthusiasm for that back it seemed like a good time to get posting here again.

You may remember, around the middle of the last year I picked up a couple of Reaper Bones models  (I did a review of a Bones Dwarf for the last ever issue of the Ancible).  As a quick recap, the Ogre was pretty much fine, but Michelle the Ranger suffered quite badly from the problems inherent to the plastic Reaper uses.  Jeff over at Pirate Viking Painting has done a review of the Bones models too and we have come to similar conclusions:
  • The material is too pliable, particularly sword blades, spears, etc which can be incorrectly curved straight out of the packet and require patient fixing
  • Mold lines are a bugger to remove, sanding chews the plastic, scraping doesn't work, and by carving you are in serious danger of removing detail.
Bikkul the Ogre

The Ogre is a pre-kickstarter model.  As it's a larger model, it doesn't suffer from the detail blurring that comes with casting in the softer plastic.  This is a proper quick and dirty paint job - all the base coats were done at once, and then the entire model was washed with Agrax Earthshade.  Each element received two highlights and I added some dirt and rust.


This approach works really well when speed is of the essence (which is what the Bones models are all about), and particularly if you can use a ubiquitous base coat like Charadon Granite, or Dryad Bark.  The skin on the model is well defined so it made shading and highlighting a breeze.  Pretty much the rest of the model lends itself to dry-brushing highlights, which is a blessing when you want to get something done quickly.  


There's now a bit of a story behind Bikkul.  Mrs Walker and I had a few friends over for a gaming weekend, and one of our friends introduced us to the Pathfinder Role Playing Game.  In our introduction game, at the end of the quest we came up against an Ogre who had eaten our horses (I fell asleep when I was on watch and lost them), and despite getting knocked unconscious my character, a slightly evil Half Orc, managed to dispatch him.  In honour of our fallen foe the ogre became Bikkul.

All-in-all the Ogre is perfect for the Bones plastic as he's big, solid, and there's nothing thin that would bend easily.  The mold lines were OK but did require some work, hopefully they didn't show up anywhere on the model too much.  I've not stuck him on a base, but I think if I was to use him for gaming, he'd probably work better on a round 40mm base.

Michelle the Ranger


Michelle was a pain in the backside to prepare and not much more fun to paint.  The pliability of the plastic meant the swords were difficult to clean up and keep straight, and getting to the mold line down the leg underneath the cloak and body drove me to distraction.
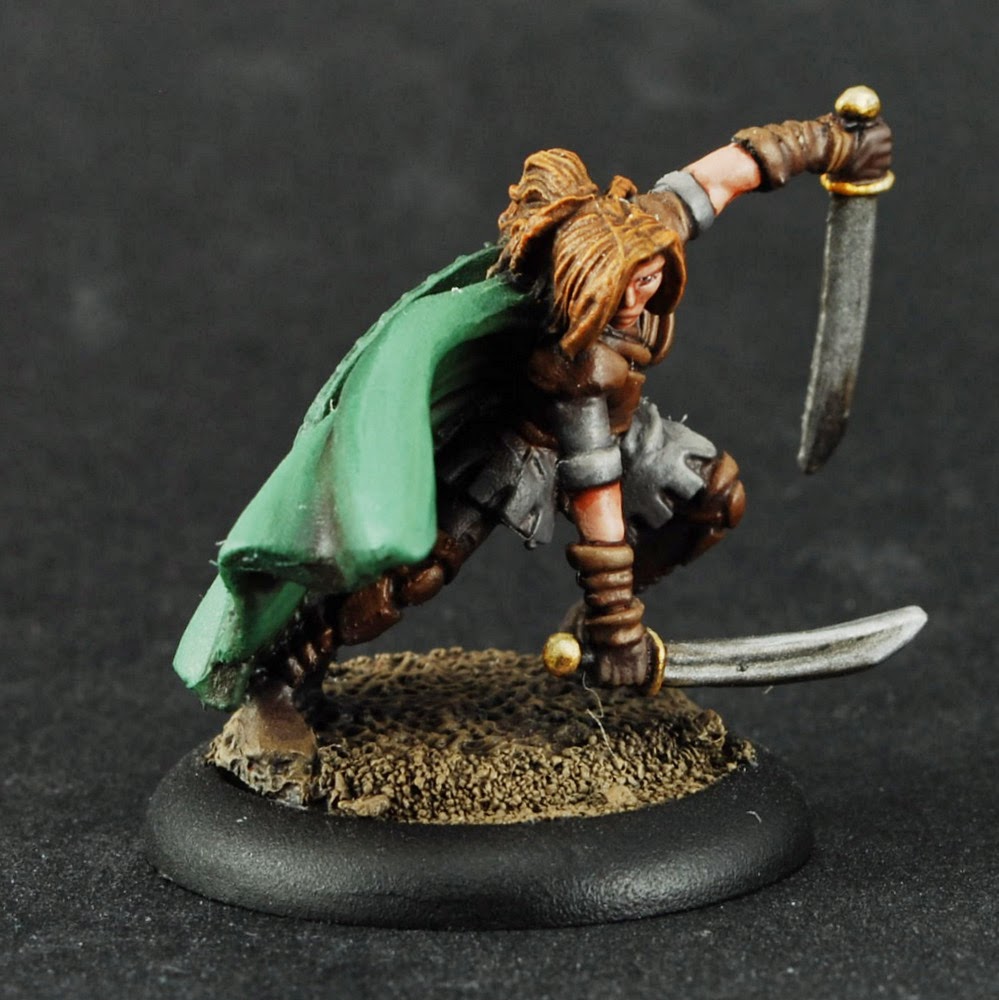

Even more painful was the mold line down the hair.  There's no way I could get rid of that cleanly, so I left it there - I'm hoping it looks like a stray hair, but even I'm not convinced...


To be honest the model just felt "wrong" from start to finish.  It was difficult to clean up, and unlike the Ogre, the paint didn't adhere to the model very well.  She was meant to be a quick paint job too, but in the end I had to try and blend the highlights as best I could.  She feels like a toy rather than a finely crafted miniature (admittedly the varnish came out shiny which hasn't helped).  Even photographing her was painful.

In  review, although the Bones models are cheap, I will be very choosy about which ones I purchase.  I would definitely recommend the Ogre, but avoid Michelle, she's not worth the pain and frustration.

I love Reaper models and I think this Sorcerer demonstrates why you're best off sticking with the metal versions...


As always, comments and criticism welcome!

Wednesday, 19 June 2013

Bones and a Beastman

In the last ever issue of the Ancible, I wrote an article reviewing a Reaper Bones miniature.  For those unaware, Reaper are reissuing large swathes of their range in white plastic, making them much cheaper and supposedly easier to work with.  In the article I expressed the concern that this new material was a softer plastic than we've come to expect from GW, Privateer or Mantic, and is prone to bending.  On a recent trip to London, I popped into Orc's Nest and they had a good range of the new Bones line - so I picked up an Ogre (one of their original, pre-kickstarter Bones figures), and Michelle the Human Ranger character.


At £2.50 each they seem good value, especially for the ogre - he's a little flexible but nothing much to worry about.  Pinned to a 40mm base, he'll be sturdy enough.  I guess Michelle is still good value for £2.50, but the arms and sword blades would have been enough to make me balk at buying her in plastic form had I known previously.


In the first picture you can see there's a little bend in the sword blade anyway, but as demonstrated inexpertly in the second picture, even a little pressure causes everything (sword blade and arm) to bend alarmingly.  I'm not convinced that the paint will bend as much without some cracking, but I'll put some paint on her this weekend and we'll see how it goes.  I'm tempted to replace the swords with some old Empire swords, but that won't stop the arms flexing.

The Bones kickstarter was really successful, hitting quite a few stretch goals - were people aware of what the miniatures were made of before they pledged?  This would have been an absolute deal breaker for me, and I'm a HUGE fan of Reaper miniatures...

In other news...

I've given myself a new rule - I'm not allowed to buy a new miniature until I've painted one I already have.  Therefore my lead/resin/plastic mountain doesn't actually increase, and it's some extra motivation to get stuff painted.  One of these completed miniatures is an old Marauder Beastman:


"Garg" is not the most dynamic of figures, and he's quite obviously a Marauder sculpt rather than a Citadel one.  He's on a round base, as he'll be another member of a Nurgle(ish) warband for whatever skirmish game I might end up playing. If this plan falls by the way side, it will be relatively easy to transfer him to a square base if needed.  

It's a quick and dirty paint job, with P3 Beast Hide, Stormvermin Fur, Dryad Bark and Deathworld Forest providing the majority of the base coat.  The metals were dry-brushed onto the Dryad Bark, splotched with Chestnut Ink, and then dry-brushed again.


The shield is another Marauder product (Marauder shields were the business back in the day), specifically an Undead shield, but I think it works well for a Nurgle Beastman.  The green was shaded with Agrax Earthshade, and then highlighted with the base coat, and then mixing in more and more Karak Stone.


The skin was washed with Seraphim Sepia, and then highlighted with the Beast Hide, and mixing in more and more Rakarth Flesh. Across the model I glazed on a little Druchii Violet in places to mix up the colour a little, and then gave the whole model a very, very light dry-brush of white, just to pick out the top edges.

His brother Harg (another Marauder sculpt) will be started soon, alongside the first two of my Salute haul.  I'm well behind on my plan to paint up everything I bought at Salute, so I need to pick up the pace...

As always, comments and criticism welcome!

Tuesday, 26 February 2013

I ATEN'T DED

Yep, I am alive, just about, and still painting!  As Terry Pratchett fans may have worked out by the post title, I got my hands on one of the fantastic Discworld sculpts from Micro Art Studios, and in particular, Granny Weatherwax:


The sculpting on this miniature is fantastic, and  is very true to the (later) art work from the books (Calendars, Maps, Graphic Novels, etc).  I've been having some issues with Testor's Dullcote recently so she's a little shinier than I had hoped for - I'm seriously considering going back to the trusty Humbrol stuff, as that seems to work better than anything else.  


The colours are all my standard way of doing things recently, so I won't bore you and repeat the details.


The face is fantastic (the photography isn't) and was a real joy to paint.  I love it when the faces on models have so much detail, and the eyes are so nicely defined.


Her trademark boots are another nice touch (the shine actually works here), as are the hairpins.  All in all she's a really nice model, with all the cool details that make Granny, well, Granny.

In other news, alongside a few other ongoing projects and my next Ancible article, I've started on my next Reaper model:


Not made a huge amount of progress yet, but I'm really pleased with the head and cowl - again, it's nice to have well defined eyes to paint.

Gaming wise, I've had a go at Warlord's Bolt Action (28mm World War 2 for those who haven't seen it), which so far has proven to be a fun ruleset, quick to learn and get to grips with.  If I can do a bit of clearing of my ongoing projects, I might be tempted to get some British Paratroopers...

As always, comments and criticism welcome!


Monday, 4 February 2013

Ymrilix the False

Six months ago, I bought a tube of Crawford and Black metallic red paint from a local book/art store, and promised to experiment with it (I said a month, but you know how that works with me...).  Well, over the weekend, I did get to play with it, and I'm pretty damn pleased with the results!


The miniature is Ymrilix The False from Reaper. It's a bit of an odd pose, and not entirely natural in my opinion, but he's nicely detailed and was really fun to paint.  There are only 4 colours on this model, red, gold, steel and leather, so he was pretty quick and simple to do too.

The red was very straightforward thanks to the Crawford and Black paint.  It took 3 or 4 coats to go evenly over the black undercoat, which was particularly time consuming as the paint seemed to take an age to dry. I may have thinned the paint too much, but I think next time I'll use a grey undercoat.  Once the base coat was dry, I washed it with Agrax Earthshade, which while not my favourite shade for brown, does the trick with red.  With the wash dry, I then highlighted first with the red and then added more and more GW Auric Armour Gold, until it was pure Gold on the top edges.  Without the solidity of a non metallic colour mixed in, the gold was a little trickier to work with, but it's come out pretty well.


The gold is pretty much the usual method, starting with Dryad Bark and mixing in the gold for highlights, but rather than going up to pure gold I stopped around half way and then mixed in the Mithril Silver, making the gold a little duller and less yellow/orange.  I think this stands out from the red nicely, and works better for an "evil" miniature.


Nothing too exciting for the steel (i.e. the sword and chainmail), Army Painter Gun Metal for the base, washed with Nuln Oil and highlighted up with Chainmail and Mithril Silver, with some carefully blended in Abaddon Black shading where appropriate.


The leather was even more simple than the steel - Dryad Bark base, with more and more Bestial Brown, and then Snakebite Leather mixed in for the highlights - job done!

So not too bad for a few hours work over the weekend - the metallic red paint is definitely a winner in my opinion, and I'm going to be finding the occasional armoured vampire model, and maybe a few Khorne warriors to use it on.

As always, comments and criticism welcome!

Thursday, 11 October 2012

Boris the Executioner

After the serious nature of my last post (thank you for the comments everyone, much appreciated, there's likely to be a similarly themed post in the future, and how miniature painting helps), it's back to miniatures again.

Is it just me (and the guys at Reaper and Heresy) or is Boris a really appropriate name for a fantasy warrior?  This chap is "Boris the Black" from Reaper, he's another from my half-finished list, and he's been sat around for a long time.


To be honest he wasn't the most fun miniature to paint for some reason, and in the end I just wanted to get him finished and out of the way.  The black armour is my current usual method, without the final black wash, as I was happy enough with the way it looked.  The horn on the shoulder pad worked nicely, but the horns on the knee-pads look a bit flat, and I'm tempted to wash them with Devlan Mud to tone them down and shade them.


I'm really pleased with the axe-blade - at one point, after shading and highlighting, it also looked flat so I went back to it, and using Dryad Bark and Black, I painted in some more shading - kind of like how it's done with non-metallic metals, and it now looks much better (shout if you don't think it looks right...).

The cloak lets the miniature down in my opinion and I think I'm going to try some sort of subtle freehand on it to liven things up, it doesn't help that I can't get the spray varnish (Testor's or Tamiya) dry matt on it, so it's hard to see the shade and highlight contrast.  It was a base of P3's Cryx Base, highlighted up with Catachan Green and Deathworld Forest, then washed with Agrax Earthshade - I think it could have done with a reapplication of the highlights afterward.

So a request from me to you the readers - any suggestions on what would work well as a freehand motif on the back of the cloak?  I'd like to keep it subtle, so I'm thinking along the lines of something in black, dark brown or dark red, or possibly a lighter green - what do you think suggest?


The skin I'm actually pleased with - it's a base of P3's Beast Hide, washed with Ogryn Flesh.  The highlights are then built up through the base to a final highlight of P3's Ryn Flesh.  To add in a little colour and variation, I carefully applied some Leviathan Purple to some of the recesses on the face and to the scars/veins on the arms.


He looks good with Valaska Syn, so I think this maybe the start of a new warband (for what, I don't know yet), a group of selfish, rather nasty mercenaries, with some slightly evil/chaotic tendancies.

As always, comments and criticism welcome!

Wednesday, 14 March 2012

Praying Knight Complete...

Mornin' all.

The praying knight is finished.  I've been practicing a little more at the picture processing malarkey (using GIMP), and I'm beginning to get the hang of it I think.  I'm having all sorts of colour balance trials with my camera, so I've used GIMP to get it to where I think it should be (certainly a lot damn closer than what they were pre-processing).  I need to do more with the camera in the first place so I don't have to mess about with the pictures quite so much afterwards, but this will do for now.


I'm really pleased with this chap, he's not perfect, but the overall look and feel I was going for has come across pretty well (I hope).


Most of the colours I've gone over in previous posts - I think the only ones I haven't really covered are the hair and skin.  So the skin first:
  • Base:  Tallarn Flesh
  • Shade:  Gryphonne Sepia
  • H1: Tallarn Flesh
  • H2:  A 1:1 mix of Tallarn Flesh and P3 Ryn Flesh
I've been careful not to go too light with the highlights as his face is mostly in shadow.  I was very relieved that his eyes are closed.  The sword and hands are a separate piece from the rest of the model, so I wasn't sure whether I should glue that on before or after painting.  As it was, the lower arms didn't fit too well on the elbow guards, and needed a lot of work to get to fit, so the decision was made for me.


The hair is nothing too spectacular:
  • Base:  Khemri Brown
  • Shade:  Devlan Mud
  • H1:  Khemri Brown
  • H2:  1:1 mix of Khemri Brown and Dheneb Stone
  • H3:  Dheneb Stone
  • Glaze:  A thin wash/glaze of Gryphonne Sepia was applied to tone everything down
The final glaze really did do the trick, as it was too bright before.  All that was left to do was sort out the base - here I used some Gale Force 9 basing materials in patches, interspersed with some of the grass tufts I'd bought from Mutineer Miniatures.  The tufts are actually quite big so I broke a couple apart to use.  I love the effect they give, with the autumn leaves dotted about, and really add to the model.  A couple of coats of Humbrol Matt varnish flattened off the model nicely.

Next up (amongst other things) is my fledgling warband for "Get the Girl, Kill the Baddies":


From left to right - Ulf the Mad, Ifil Ironwolf, Brevik Dragonslayer (yeah I know he's a bit wimpy to represent me, but he'll have to do...), Breggan the Bear, and his brother Juggo the Dwarf.  I wanted Juggo to be a dwarf human (a la Tyrion Lannister from Game of Thrones) rather than a member of the Dwarven race - Juggo isn't exactly my creation, it looks like "Juggo" is written on the tab of the miniature, and it seemed appropriate...


Readers of a certain age may recognise some of these miniatures, as they are certainly old - Brevik has 1985 written on the tab!  They are all very old Citadel miniatures from their long OOP Norse range:


Ulf is the only miniature I'm not entirely happy with - looking at his outfit, I swear he was meant to be a Wood Elf Wardancer and they changed their minds about him and added a fur cloak and covered his pointy ears. I might swap him out for a Hasslefree Viking Libby at some point, but we'll see how he paints up.

My challenge with this bunch of crazies is to batch paint the majority of them and then finish each up individually with the details.  Regular readers will know how much I enjoy batch painting, so this should definitely be a challenge!  Hopefully I'll have some background for these guys soon too, all epic swords and sorcery stuff, with heroic deeds, betrayal and vengeance.

I may be borrowing from other works in the genre, but only a little...

As always, comments and criticism welcome! 

Tuesday, 6 March 2012

Further Prayer...

A little more done on the praying knight from Reaper - this is "bright" for me...


There's plenty of work still to be done (I keep spotting bits of blending that need to be improved), but I'm pleased with the solid start I've made.  The grey of the scabbard is not-so-subtly pinched from Jeff at Pirate Viking Painting, who took the Charadon Granite base coat I use for green and added codex grey to it, which works really rather well. 

The green is not based on Charadon Granite (I'm trying this bright malarkey remember?), but followed the scheme I've used on my Eldar Dire Avengers (still numbering only two completed at present):
  • Base:  Catachan Green
  • Shade:  Devlan Mud
  • H1:  Catachan Green
  • H2:  1:1 mix Catachan Green and Camo Green
  • H3:  Camo Green
  • H4:  1:1 mix Camo Green and Dheneb Stone
I like this colour as it's light, without being gaudy (despite using Camo Green).

The yellow is slightly different to my usual Tausept Ochre base and Gryphonne Sepia wash scheme, but to be frank it looks the damned same anyway, and was more effort.  It looks a little flat in the picture (phone camera again), but it looks better in "real life", trust me.
  • Base:  Calthan Brown
  • H1:  2:1 mix Calthan Brown and Tausept Ochre
  • H2:  1:2 mix Calthan Brown and Tausept Ochre
  • H3:  Tausept Ochre
  • H4:  1:1 mix Tausept Ochre and Iyanden Darksun
  • H5:  Iyanden Darksun
  • H6:  1:1 mix Iyanden Darksun and Dheneb Stone
All that for no extra benefit over Breviccus Flavus - rubbish.  Thankfully I've painted all the yellow bits.

In other news, I found out about this WIP skirmish game from Andy Hoare:  


This has really piqued my interest - while I love all the alternative worlds and stuff out there, I've had a real hankering for a proper old-fashioned style fantasy game, something a bit Conan or Red Sonja in feel to it.  I've downloaded the rules, but haven't had a chance to read through them yet.  However I'm already scouring the Reaper and Hasslefree websites to come up with some ideas for a warband or two (or three, four, etc) - I'm going to try and push our gaming group to give it a go (if we can fit it in).

I hopefully should have the Knight done this weekend, then I've got a load of other projects to be cracking on with...

Onwards and upwards (possibly sideways)!

Sunday, 4 March 2012

Praying Knight WIP

...and we're back!  The next article for the Ancible is done, so I've got some time to do my own stuff.  These are a couple of WIP shots of a praying knight from Reaper, a nice little sculpt I wanted to practice some metalwork on.  A lot of my miniatures are on the dull/dark side, so I wanted to do something a bit brighter this time. 


With this in mind I wanted the armour to look polished:

  • Base coat:  Boltgun Metal
  • Shade:  A good wash of Badab Black
  • H1:  Boltgun Metal
  • H2:  Chainmail
  • H3:  Mithril Silver
  • H4:  A 1:1 mix of Mithril Silver and White added as a very small edge and point highlight
Nothing ground breaking, but I'm practicing the blending here, which is going quite well.  There are a couple of bits that need work (the visible foot and the sword blade), but other than that I'm pleased with the results.


The gold is equally as straightforward:

  • Base Coat:  Tin Bitz
  • Shade:  Devlan Mud
  • H1:  Tin Bitz
  • H2:  1:1 mix of Tin Bitz and Burnished Gold
  • H3:  Burnished Gold
  • H4:  1:1 mix of Burnished Gold and Mithril Silver
The gold is not that bright, but it looks old and works well with the bright steel of the armour.  Next up is the green and yellow tabard and details, and a grey scabbard.

In other news, the Breviks made a trip to Dartmoor to recharge the batteries, including a visit to Princetown, home of Dartmoor prison and where Sir Arthur Conan-Doyle wrote Hound of the Baskervilles.  Also some walking on the moor:


Some inspiration for basing and terrain - I've bought some Woodlands Scenics "realistic water", so will be trying that out at some point.  :-)

More soon!

Saturday, 22 October 2011

A Beast among us…

So the DIY is on hold for a week or so until the plaster is properly dry - a bit annoying, but nothing I can do about it other than be patient.

I’m still on my “clearing the painting desk” mission, and my next finished miniature is this beauty from Reaper:

Beastman at Kenny's

My photography has improved a little – this picture was taken under the supervision of Kenny, owner of the Ancible and the guy who takes all the pictures of my finished miniatures for the articles, using his setup.  He gave me a crash course on taking pictures of miniatures, and I’ve learned a hell of a lot.  One of the main things I’ve learned is that I don’t have anywhere near enough light (see my pictures below).  Not sure how I’m going to solve that bit yet, without spending plenty of money…

Beastman Angle

This miniature was an absolute blast to paint (yep, he’s meant to look Khornate) – the skin I’m particularly pleased with:

  • Base:  P3 Beast Hide
  • Shade:  Devlan Mud
  • 1st highlight: Beast Hide
  • 2nd highlight: 1:1 mix of Beast Hide and P3 Ryn Flesh
  • 3rd highlight: Ryn Flesh
  • Glaze: Gryphonne Sepia

The final glaze really seemed to tone everything down and tie it all together, I’m tempted to use it more often.

Beastman Rear

The rest of the miniature was painted how I usually do things, the horns were a bit of a challenge as in trying to remove some pretty nasty mould lines, I had to sacrifice some of the ridge detail, which had to be recreated using paint.  Thankfully the tops of the horns were clear of mould lines, and they painted up really nicely.  It’s often tempting to dry-brush things like that, but painting on the highlights with a fine detail brush really can make a difference.

Just another bit on photography.  I’ve also learned that trying to do things on automatic really isn’t going to work, this stuff has to be done manually to get decent pictures.  Yet another area where it doesn’t pay to take short cuts!

I retook a picture of the assassin from the last post:

Better Assassin Kneeling

Still not perfect, but definitely better than the previous pictures!

A quick list of things learned:

  • You can never have too much light
  • The camera settings need to be done manually, automatic doesn’t cut it
  • Background light (from windows, overhead lights, etc) can have a huge effect
  • The background you put your model in front of can have a huge effect too…

Beastman on Red Background (I won’t be using a red background often…)

So a big thank you to our glorious dictator leader for the crash course.  I now have to get some photography practice in, and when the lair is set up properly I’ll have a permanent place to have the camera set up

The next article, Bikou, and maybe something else are next on my plate.  Off to Warfare at Reading next month, I noticed Black Scorpion Miniatures will be there, so I maybe picking up some Elven Pirates…

As always, comments and criticism welcome!

Sunday, 16 October 2011

Getting there…

It’s been a while!  All work and no play makes Andy a dull boy.  I’m trying to make some time every day to paint, but it’s been a bit tricky recently.  I’m slowly clearing all the half finished projects on my workbench – first up is the Reaper Assassin I started a while back.  The photos were taken quickly as I don’t have somewhere to set up properly at the moment

Assassin Front

I wasn’t quite sure how to paint him, I didn’t want to do variations on black as it wouldn’t be much fun to paint, and I wanted to do something a little more colourful, but not gaudy.  so I tried the old “Charadon Granite as a basecoat for everything and wash it all with Badab Black” trick that I’ve used on Warhammer Fantasy models in the past.  I had somewhat mixed results with this - the cloak, the boots and the green elements worked really well with this method, but the purple really did not, so I had to re-base the purple.

Assassin Side

I’m really, really happy with the dagger, particularly the blade, which came out fantastically (the pictures don’t do it justice to be honest) .  I also feel like I’m getting the hang of skin tones – for this chap I wanted a paler skin, so I tried a different method:

  • Base:  Dheneb Stone
  • Wash: Gryphonne Sepia
  • 1st highlight: Dheneb Stone
  • 2nd highlight: Dheneb Stone and Skull White

The cloak was a simply highlighting with Charadon Granite and more and more Dheneb Stone added, and finished up with a glaze of very diluted Badab Black to tie it all together.

Assassin Rear

Not a complicated paint job by any means, and he was pretty quick to paint.  He’s quite a classic fantasy type of miniature, feeling a bit “old school D&D”.  With my current love for Reaper miniatures, it would be nice to find a good set of universal fantasy skirmish rules to use these guys in – anyone know of any?

Work on the new lair continues, and I think most of the hard work is done, and the painting should be finished by next weekend.  I did the major job today and plastered the old fireplace:

Lair WIP

I think it’s fair to say that I won’t be putting plasterers out of business any time soon, and it’s going to take some Polycell products to make it all smooth, but for my first attempt at plastering it’s not too bad.  It was a much easier process than I thought it would be – and once you get into the flow of it, it’s actually quite relaxing.

Miniatures wise, next up is Bikou (the Ninja from Bushido), another Reaper mini and stuff for my next Ancible article.

As always, comments and criticism welcome!

Thursday, 28 July 2011

Not such a grim Reaper...

Not too much painting going on this week, I've done a little bit for my next article, and I've got the next couple of side projects started.  My love affair with Reaper miniatures continues:


Not quite sure what I'm going to do with this chap yet, I'm thinking different hues of black, with some dulled metalwork.  The other side project is Boris MkII:


I'd like to keep with the "Boris the Black" theme, so I'm thinking black cloak with some freehand on the back, and some beaten up armour - plenty of dents and scratches with some rust in places.  Or maybe black armour (still beaten up) with a dark red cloak?  Opinions (and alternative ideas) would be most welcome!

As you can see I've only pinned them to the 30mm bases so far, the next stage will be to fill in the gaps between the metal base and the edge of the rounded lip with modelling sand (and for Boris MkII, some bits of slate, stuck up at the front), and then they'll be undercoated.  Also on the horizon is Gandalf on his cart full of fireworks, and at some point the other Warjack from my Khador box set.

Then there are the Eldar Dire Avengers...

...and some Confrontation minis...

...and for some reason I'm itching to paint a Space Marine again as well - what's that about? 

Sunday, 24 July 2011

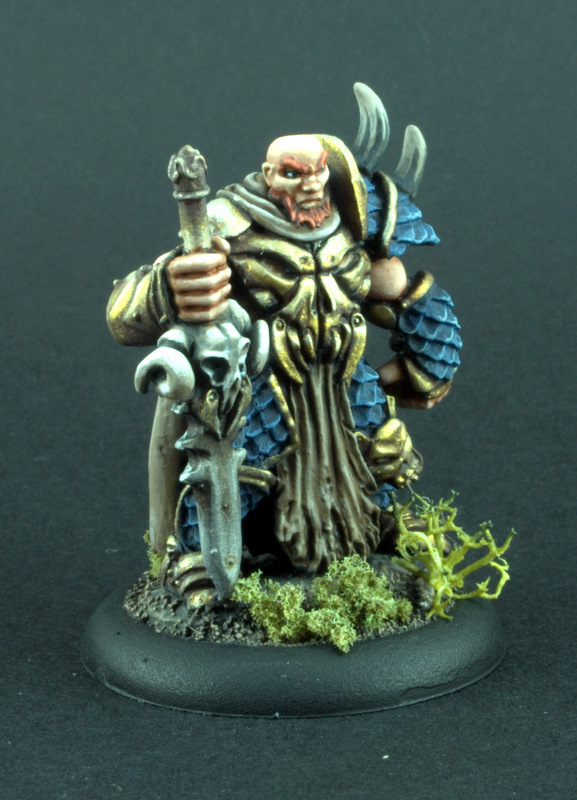
Big Bad Bald Bearded Boris

I'm really pleased with this chap - he does look like he's been ripped right of World of Warcraft (his fists are bigger than his head for a start), but that's no bad thing, and it was nice to do something a bit brighter than usual.  Boris was a single piece miniature, and quite two dimensional, but I love the pose, and it feels quite "old school". (early WIP shot here)


The blue was simple enough, a Necron Abyss base coat, highlighted with Regal Blue and then Ice Blue (with a little mixing for in-between stages).  The highlighting was done with drybrushing rather than blending - this chap was meant to be a little light relief in between projects, so I wasn't going to stress out blending each individual scale.


The horns and sword hilt were simply a progression through Charadon Granite, Khemri Brown, Dheneb Stone and for the sword hilt only a top highlight of Skull White - these were blended/layered as the surface areas were larger.  Charadon Granite and Chaos Black were used to paint the striations on the horns.

The skin tone is my favourite thing about the model , a base coat of Tallarn Flesh was washed with Gryphonne Sepia.  This was highlighted (blending) with Tallarn Flesh and then a 1:1 mix of Tallarn Flesh and Elf Flesh. finally a top highlight of Privateers P3 Ryn Flesh was blended in.  This gives a slightly paler flesh tone than I would usually use, but it works well with the ginger beard and eyebrows, a World of Warcraft inspired colouring.


The Gold started with a base coat of Tin Bitz, shaded with Devlan Mud.  This was then highlighted with multiple thin layers of Burnished Gold working towards the edges of the armour.  Then a 1:1 mix of Burnished Gold and Mithril Silver was applied as a top highlight.  The sword blade was Boltgun Metal shaded with Badab Black, with a blended highlight of Chainmail.  Some Devlan Mud was applied to the blade, just beneath the skull hilt to add a little more shading.


The cloak and tabard is my normal "exciting" scheme of Khemri Brown, shaded with Devlan Mud and blend/layer highlighted with Khemri Brown and Dheneb Stone.  To continue the WoW theme I added some moss and lichen to the base (also to mask where the lump of metal he stood on joined the base I added him to), and he was complete!  A quick, easy and funky looking model which was fun to paint, it's nice to have something like Boris on your painting table to give you a break from the serious projects.

I'm a huge fan of Reaper miniatures (http://www.reapermini.com/) - they're not all brilliant, but there are so many lovely looking miniatures full of character, that it's easy to find something fun to paint.  Also I recommend the search section on the galleries - really helps if you're looking for something specific (e.g. someone human male, in plate armour, dual wielding...).

As always, comments and criticism welcome!